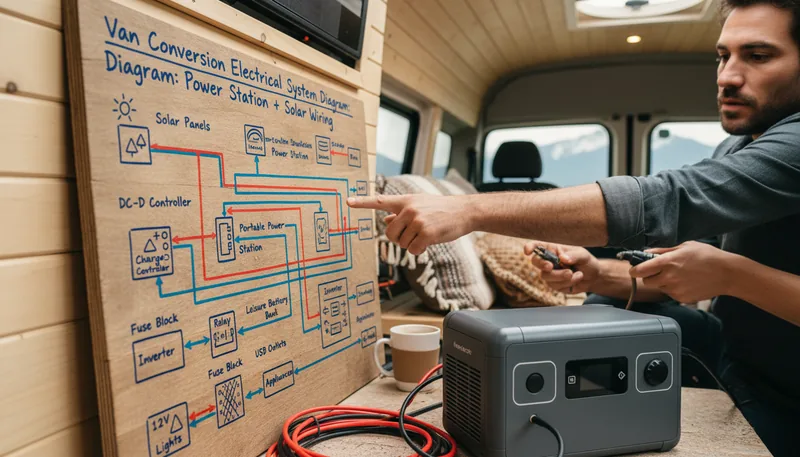
Van Conversion Electrical System Diagram: Power Station + Solar Wiring
The simplest van conversion electrical system routes solar panels into a portable power station, then distributes power to AC and DC loads. You need two connections in and two out: MC4 solar cable in, car charger (alternator) in; AC outlet loads out, 12V DC loads out. This guide walks through each segment of that topology with real wiring specs, connector types, and sizing math — so you can plan your build before buying a single component.
1. How much power do you actually need? Calculate your daily Wh
Your capacity requirement is the sum of each device's wattage multiplied by the hours you run it each day. Here are the common van loads:
A 50W compressor fridge running 24 hours draws 1200Wh. That is your biggest load by far. Add a 60W laptop for 4 hours (240Wh), a 30W ventilation fan for 8 hours (240Wh), LED lighting at 30W for 5 hours (150Wh), a 20W phone charger for 2 hours (40Wh), and a water pump at 50W for 0.5 hours (25Wh). Total: roughly 1900Wh per day.
For the station, multiply your daily total by 1.3 to leave a buffer. In this example, 1900Wh x 1.3 = 2470Wh. A 2500Wh station covers you comfortably with daily solar recharging. For solar sizing, take that daily Wh and divide by your average peak sun hours (4–5 hours in most of the US). At 4 peak sun hours, 1900Wh / 4h = 475W of panels. Most van rooftops fit 300–600W depending on roof size and layout.
If you run an induction cooktop (1000–1800W per use), add your cooking Wh separately. A 1500W cooktop running 30 minutes adds 750Wh to your daily total.
1200Wh/day
Compressor fridge (24h)
50W average draw x 24h — your single largest van load
240Wh/day
Laptop charging
60W x 4 hours of use
240Wh/day
Ventilation fan
30W x 8 hours, running while sleeping
150Wh/day
LED lighting
30W x 5 hours of evening use
2. Wire topology: the four segments of a power-station van build
Think of the system as four segments. Segment 1 is solar in. Segment 2 is alternator in. Segment 3 is AC loads out. Segment 4 is DC loads out. Each segment uses different connectors and has different efficiency characteristics.
SEGMENT 1 — Solar in (MC4 to station): Connect your solar panels to the station's DC solar input port. Panels use MC4 connectors as the industry standard. The station either accepts MC4 directly or comes with an MC4-to-8mm barrel adapter. Run panels in series to increase voltage (keeping amps low, reducing wire loss over longer roof runs) or in parallel to keep voltage low if your station has a low max input voltage. Most stations accept 12–60V or 12–150V on the solar port — confirm before connecting panels in series.
SEGMENT 2 — Alternator in (12V cig or Anderson): While you drive, the station recharges from the van's alternator via a 12V cig-lighter cable (100–120W) or a direct battery connection with an Anderson SB50 cable for up to 400W. The DJI Power 2000, for example, accepts 500W via its car input port. Keep the cable run short and use 6AWG wire minimum for direct battery connections at 300W+.
SEGMENT 3 — AC out (inverter loads): The station's AC outlets handle your induction cooktop (up to 1800W), laptop brick, power drill, and similar devices. The station converts stored DC to 120V AC through its built-in pure sine wave inverter. Pure sine wave is required for induction cooktops and sensitive electronics — all the top-ranked van life stations in our database output pure sine.
SEGMENT 4 — DC out (12V cig, USB, Anderson): The 12V car outlet, USB-A, USB-C, and Anderson output run DC loads directly without passing through the inverter. This saves 5–10% in conversion losses. Run your compressor fridge, phone chargers, and fan exclusively on DC output. The 12V outlet on most stations is rated 10A (120W); a high-draw fridge may need the Anderson or XT60 port rated for higher current.
MC4 solar input voltage range12–150V typical
Check your specific station — some cap at 60V, others at 150V
In our scoring of 123 power stations across van life requirements (1500+ cycle life, 800Wh minimum, 200W+ solar input, 1000W+ AC output), these units ranked at the top. Prices are current as of April 2026.
The DJI Power 2000 ($1099, 2048Wh, 3000W AC, 22kg) is the standout choice for most van builds. It hits the 2000Wh sweet spot for a fridge-equipped van, accepts up to 2200W of solar input (one of the highest in its class), and at 22kg stays portable enough to carry in and out of the van. Its 3000W continuous output handles an induction cooktop (1800W) with headroom.
The Dabbsson DBS2100 Pro ($829, 2150Wh, 2400W AC) offers the most capacity per dollar in the 2000Wh class. The 2150Wh capacity and 2400W AC rating cover all typical van loads, and at $829 it is the most affordable sub-$900 option that meets our 1500-cycle minimum.
The Anker SOLIX F3000 ($1299, 3072Wh, 3600W AC, 41.5kg) suits weekend vans or couples where two people run heavier loads. At 3072Wh it covers nearly two days of use without solar input. The 3600W AC output runs any induction cooktop and a high-draw appliance simultaneously. Weight (41.5kg) makes it a less portable option but acceptable if it stays mounted in the van.
The Dabbsson DBS3500 ($1599, 3430Wh, 3600W AC) is the top-ranked unit overall in our van life activity scoring. It pairs high cycle life with 3430Wh capacity and 3600W output for builds that need more headroom. For full-time van dwellers logging 365 cycles per year, the high cycle rating is a meaningful long-term value.
For a portable power bank approach on a tighter budget, the Bluetti Elite 300 ($1099, 3014Wh, 2400W AC, 26.3kg) carries a solid cycle rating and accepts 2400W solar input.
4. Common mistakes when wiring a van conversion electrical system
The most common and expensive mistake is connecting more solar watts than the station's input port can accept. If your station maxes out at 400W solar input and you wire up three 200W panels (600W), the station clips the extra current and those panels produce nothing above the cap. Always match your panel wattage to the station's rated maximum solar input — no more.
The second common mistake is running the compressor fridge through the AC inverter instead of the 12V DC output. A 12V fridge plugged into the inverter loses 5–10% to DC-AC-DC conversion (the fridge's own power supply converts it back to DC). Plug the fridge directly into the 12V car outlet or Anderson port and recover that efficiency for free.
Many builders assume 1000Wh is enough for van life. Running a fridge 24/7 alone uses roughly 1200Wh per day — 1000Wh leaves you in a daily deficit even with solar. Our van life activity requirements set the minimum at 800Wh, but that only applies to non-fridge builds. A fridge-equipped van needs 2000Wh or more.
A fourth mistake is neglecting the connector voltage spec when wiring panels in series. If your two 40V (Voc) panels wire in series, the combined Voc is 80V. A station with a 60V max solar input will shut down the charge controller to protect itself — and you won't know why the solar stopped charging. Check Voc of your panel array, not just rated watts, before wiring.
Finally, some builders skip the cycle count spec entirely and buy a unit with only 500–800 rated cycles. For a van running daily, that is 1.4–2.2 years before the battery drops significantly. Our database flags any unit below 1500 cycles as insufficient for van life activity requirements.
Max solar input oversubscriptionCommon on 400W-limit stations
Panels above the limit produce no extra charging; wasted money on panels
Inverter efficiency loss (fridge through AC)5–10% loss
Recover this by running the 12V fridge on the DC output port instead
Fridge-equipped van minimum capacity2000Wh+
Compressor fridge alone draws ~1200Wh/day; 1000Wh runs a deficit
Series panel Voc checkMust stay below station's max solar input voltage
Two 40V Voc panels in series = 80V; exceeds 60V station limits
5. Power station vs fixed van electrical system: when each makes sense
A portable power station (also called a portable power bank in some van conversion communities) is the right call for weekend or part-time van use, for builders who want a removable system, or for anyone testing van life before committing to a full wiring job. Install time is near zero. You unplug and take it to a hotel. You can solar charge it outside the van while parked in a camp spot.
A fixed LiFePO4 installation beats the power station on three factors: cost over time at full-time scale, maximum capacity, and permanent integration. A fixed 200Ah (2560Wh) LiFePO4 build with a 2000W inverter-charger costs $1500–$2500 in parts, lasts 3000–5000 cycles (8–14 years of daily use), and scales by adding more batteries on a bus bar. That route handles loads requiring 5000Wh+ per day — loads no single portable station can match.
The break-even point is roughly 200–250 days per year of van use. Below that, the portable power station wins on total cost (no install labor, removable) and flexibility. Above it, fixed systems pay back their installation cost in longer battery life and lower $/Wh at scale.
For a Sprinter van conversion aimed at full-time living, plan for the fixed route from the start. For a Transit or Promaster used on weekends with occasional week-long trips, a 2000–3500Wh power station paired with 400W of roof solar handles the job cleanly without any bus bars or wiring conduits.
The audit data for the van electrical system cluster shows 32,000+ monthly searches and no competing content from AGB yet — this is the informational gap this guide is designed to close. Our database of 123 power stations gives you concrete specs to compare against any fixed-system quote.
$650–$1600 station + $200–$600 in solar panels + cables
Break-even usage level~200 days/year
Below this, power station is more cost-effective over five years
Fixed system max cycle rating3000–5000 cycles
Grade-A LiFePO4 cells in fixed builds outlast portable station cells
Summary: The Bottom Line
Size your station at 1.3x your daily Wh draw (2000Wh+ for a fridge-equipped van), route solar via MC4 to the DC input, and run the fridge on 12V DC output to skip inverter losses. A portable power bank approach costs $800–$2500 total with zero permanent wiring.
Most power stations accept MC4 connectors, the universal solar industry standard, or include an MC4-to-8mm barrel adapter. Before connecting panels in series, check the station's maximum solar input voltage. Two 40V Voc panels wired in series produce 80V, which will shut down a station with a 60V input limit.